Getting setup for a DataOps PoC
Need a bit of help?
If you have any issues, we'd be delighted to help. Please contact us at support@dataops.live
Overview#
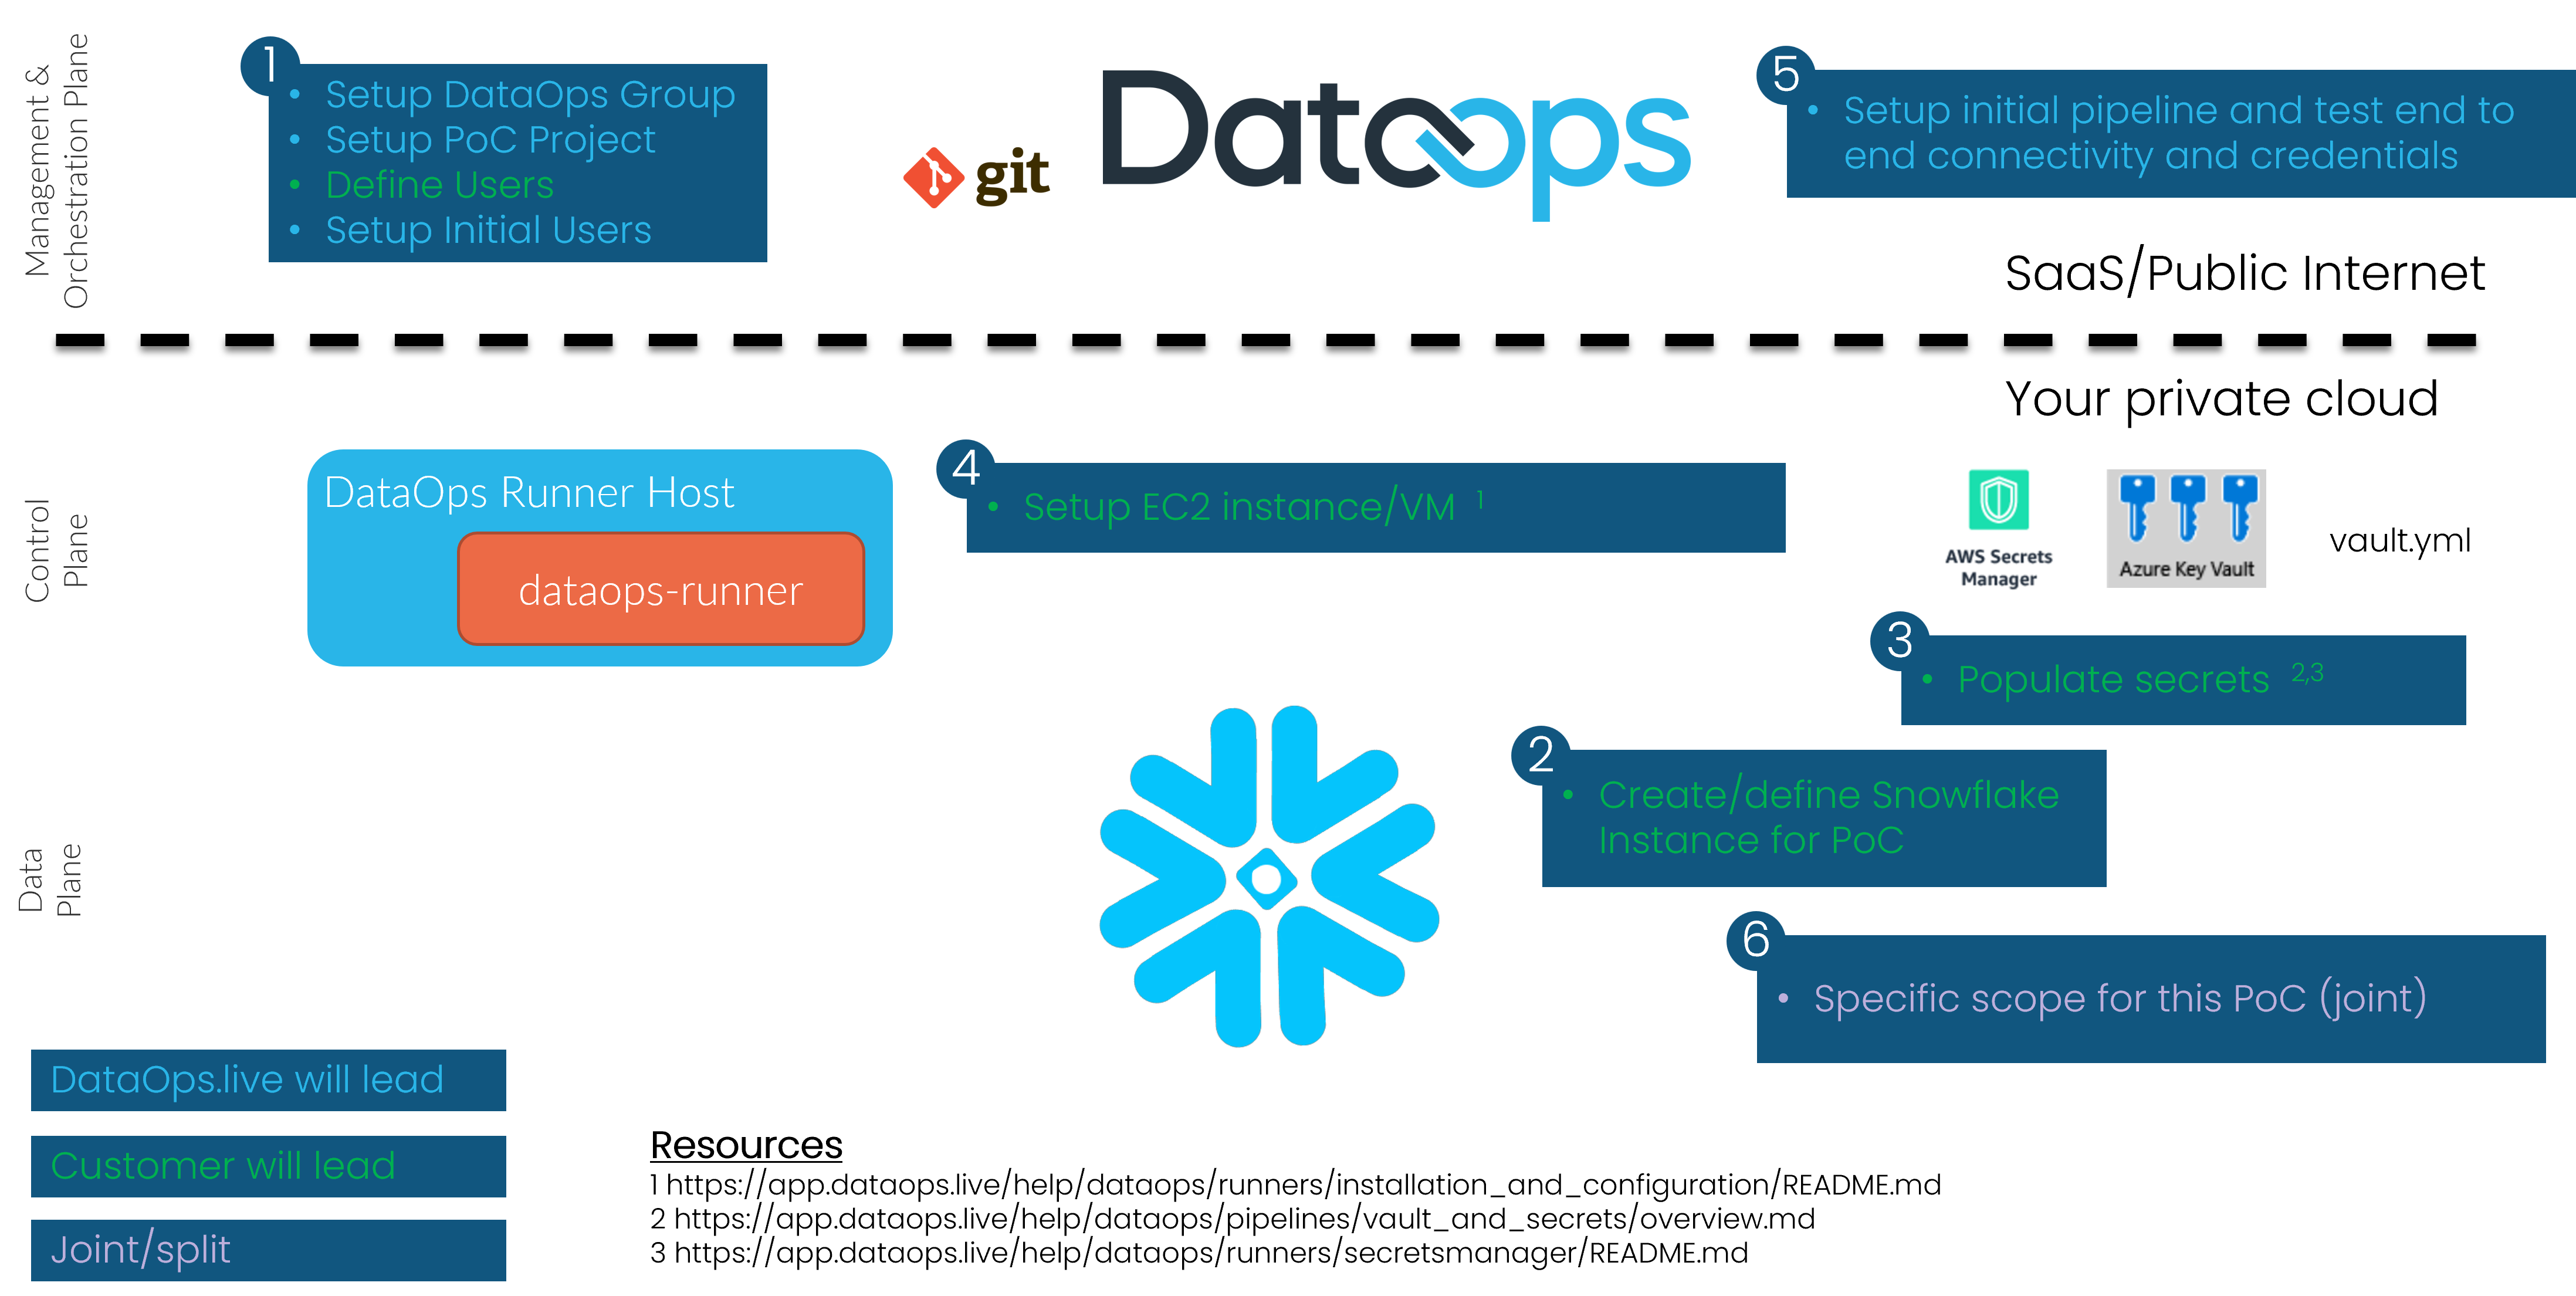
Step 1 - Setup DataOps Account#
- Setup Top Level DataOps Group - DataOps.live ☐
- Setup PoC Project - DataOps.live ☐
- Edit
pipelines/includes/config/variables.ymland set:DATAOPS_PREFIXto something that will prefix most objects inside Snowflake. For a PoC you can leave this as defaultDATAOPS_VAULT_KEYto a long random string
- Edit
pipelines/includes/config/agent_tag.ymland set the tag to something we will use later when setting up the runner e.g.
- Edit
.agent_tag: tags: - dataops-poc-runner- Define users. Customer will provide a list of names and email addresses - Customer ☐
- Create initial users - DataOps.live ☐
Step 2 - Create PoC Snowflake Instance#
You'll need a Snowflake account to use DataOps. For Production this will be your main Snowflake account (or accounts). However for PoC purposes it can often be quicker to create a disposable account at signup.snowflake.com. A user with the ACCOUNTADMIN role is needed to run the setup SQL.
---- ROLES ----
-- Admin role (DATAOPS_SOLE_ADMIN_ROLE)USE ROLE SECURITYADMIN;CREATE OR REPLACE ROLE DATAOPS_SOLE_ADMIN_ROLE;USE ROLE ACCOUNTADMIN;GRANT   CREATE DATABASE,  -- CREATEs needed for SOLE object creation and management  CREATE USER,  CREATE ROLE,  CREATE WAREHOUSE,  CREATE SHARE,  CREATE INTEGRATION,  CREATE NETWORK POLICY,  MANAGE GRANTS     -- MANAGE GRANTS needed to allow SOLE to manage users (specifically so it can SHOW USERS internally)ON ACCOUNT TO ROLE DATAOPS_SOLE_ADMIN_ROLE; GRANT ROLE DATAOPS_SOLE_ADMIN_ROLE TO ROLE SYSADMIN;  -- or to the most appropriate parent role
---- USERS ----
-- Master userUSE ROLE USERADMIN;CREATE OR REPLACE USER DATAOPS_SOLE_ADMIN PASSWORD = '' -- Add a secure password here, please! MUST_CHANGE_PASSWORD = FALSE DISPLAY_NAME = 'DataOps Master User' DEFAULT_ROLE = DATAOPS_SOLE_ADMIN_ROLE;USE ROLE SECURITYADMIN;GRANT ROLE DATAOPS_SOLE_ADMIN_ROLE TO USER DATAOPS_SOLE_ADMIN;GRANT ROLE ACCOUNTADMIN TO USER DATAOPS_SOLE_ADMIN; -- Needed for creating resource monitorsStep 3 - Populate Secrets#
To connect to Snowflake you need to set 4 DataOps vault keys. The DataOps Secrets Manager Runner is fully documented here. This guide assumes that the DataOps Runner is either:
- If using AWS, an IAM Role attached to your EC2 instance which has the relevant access to read the keys from Secrets Manager or SSM Parameter Store
- If using Azure, an Service principal attached to your Azure VM which has the relevant access to read the keys from Key KeyVault
Using AWS Secrets Manager#
If you are using AWS Secrets Manager, your configuration should look something like this (with your details substituted):
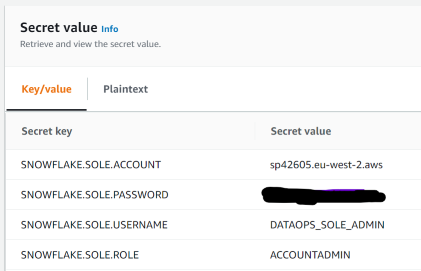
and in your pipelines/includes/config/variables.yml include:
SECRETS_SELECTION: <the name of your secret> SECRETS_AWS_REGION: <the AWS region for your secret>Using AWS SSM Parameter Store#
If you are using AWS SSM Parameter Store, your configuration should look something like this (with your details substituted):
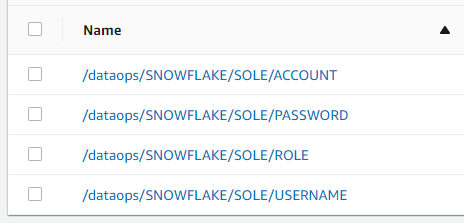
and in your pipelines/includes/config/variables.yml include:
SECRETS_MANAGER: AWS_PARAMETER_STORE SECRETS_SELECTION: /dataops/SNOWFLAKE/SOLE/ SECRETS_STRIP_PREFIX: /dataops/Using Azure KeyVault#
If you are using Azure KeyVault, your configuration should look something like this (with your details substituted):

and in your pipelines/includes/config/variables.yml include:
SECRETS_MANAGER: AZURE_KEY_VAULT SECRETS_AZURE_KEY_VAULT_URL: https://KEY_VAULT_NAME.vault.azure.net/Step 4 - Setup DataOps Runner on AWS EC2 or Azure VM#
Follow the detailed instructions here
Step 5 - Test!#
At this point you should be able to run the PoC Project using the full-ci.yml Pipeline Type. To run your first pipeline, hover over "CI/CD" in
the left hand navigation, and select "Pipelines" from the sub menu that appears. The pipeline page will appear. Click on the "Run Pipeline" button in the upper right of this page, to bring up the run pipeline page. On the run pipeline page, change the Pipeline Type dropdown to "full-ci.yml", and then
click on the "Run Pipeline" button at the bottom of the form. This will start the pipeline.
Step 6 - Specific Scope#
At this point you should have a fully working DataOps pipeline. The Snowflake Object Lifecycle Engine will have created some base infrastructure. Some other things you can try now:
- Create a
qabranch frommasterand run thefull-ci.ymlPipeline Type in this branch. This will create a QA environment in Snowflake. - Create a
devbranch frommasterand run thefull-ci.ymlPipeline Type in this branch. This will create a Dev environment in Snowflake. The DEV database will be created from the PROD database using Zero Copy Clone. - Create a
my-first-featurebranch fromdevand run thefull-ci.ymlPipeline Type in this branch. This will create a Feature Branch environment in Snowflake. The DEV database will be created from the PROD database using Zero Copy Clone.